Add checkpoints to your game
Warning
This version of the tutorial is deprecated. Please refer to the new platformer tutorial for the completely revised version of the tutorial. The equivalent information to the current tutorial can be found in Part 8.
We finished the previous tutorial by deleting the player when it collides with the enemy. This is not the way that it works in most games. Generally, instead of deleting the player, a game will have a "checkpoint". The "checkpoint" saves the state of the game and the state of the player into variables. Then, if the player dies, the game and/or player restarts from the "checkpoint".
For this tutorial, saving the state of the entire game and the player's state may be a bit too advanced. Instead, when a player collides with a "checkpoint" object, we are going to store the position of the "checkpoint" object inside variables. Also, instead of deleting the player, we are going to re-set its position to whatever is stored inside the variables.
Create a checkpoint object
Let's start by creating a new sprite object in our game. Call it "checkpoint". It can be any .jpg or .png sprite image you have. I'm going to use a cactus sprite.

Next, add the sprite object to the scene. Your sprite image may be too large or too small. Use the handlebars on the sprite to resize the image. In my case, it will be the cactus sprite object as shown above. Place it in the scene wherever you would like to have a "checkpoint". You can add your object sprite to multiple places in your scene. That way, you can set multiple "checkpoints".
Add events
Now that we have the "checkpoint" objects in our scene, let's add the events. We start with a condition to check to see if there is a collision between the "player" and the "checkpoint". If the collision occurs, we store the X and Y position of the "checkpoint" object sprite into a scene variable called checkpointX and checkpointY.


Above, we are using expressions to get the X and Y position of the "checkpoint" object sprite. This is done in a similar manner to the way that we updated the score text.
Note
If you're confused between the difference between checkpointX and checkpoint.X(), remember that the first one is the name of the variable where we're storing the position. The second, checkpoint.X() is an expression where we're getting the current position of the object called "checkpoint".
Tip
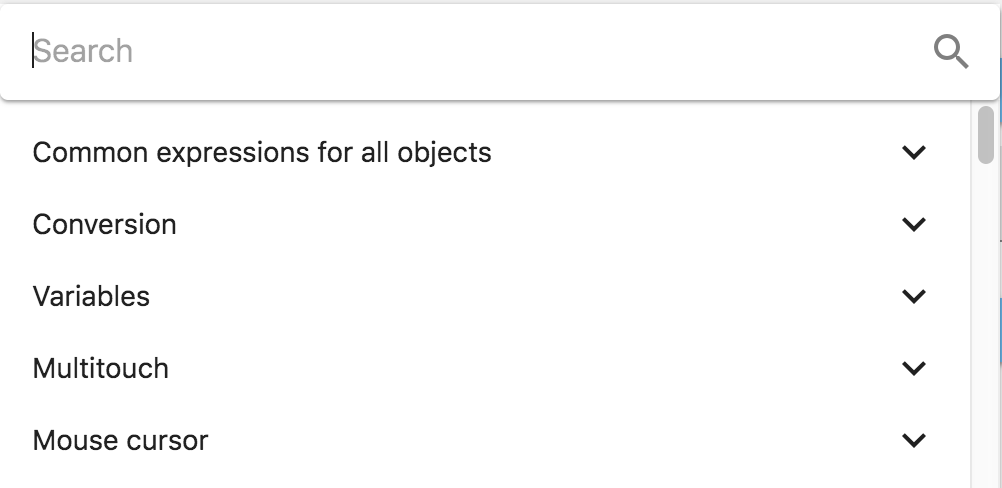
You can find more expressions in the expression editor by clicking on the blue icon next to the value fields:
![]()
When you click the blue icon, you can search all the available expressions sorted into categories.

The condition now stores the X and Y position of the "checkpoint" object with which our "Player" object has collided. So, instead of deleting the "Player" sprite object, we set its X and Y positions using the variables.


In the example above, that we are using another set of expressions to get the value of the stored variables and pass them to the "Player" position.
Solving a positioning glitch
In case you are following along and you also selected the cactus for the "checkpoint", you might also notice we have just created a bug! Our player character is taller than the cactus. In this case, the difference in the heights is "not" too much. This may not show you any problems at first glance, but you will notice that the player character does get stuck in the ground but gets teleported to the nearest surface. If the height difference was high, the character might have fallen below the ground. So, it's better to fix this problem.

In this particular case, we can easily solve the problem by scaling the cactus sprite on the Y axis to be as high or even higher than the player. Since, by now, you know how to scale/resize a sprite, let's see how to do it using a little more challenging, but also more accurate approach. Let's use math to work around the problem.

I am using a more involved solution to show you how powerful expressions can be. My solution is to set the Y position of the player using a variable. I, then, subtract the height of the "checkpoint" from the height of the "player". This way, I get the difference in Player and "checkpoint" height. I can finish the solution by subtracting that difference from whatever the variable returns.
A less difficult solution, but one still using math, would be to subtract, say, 30 pixels, from the variable's value.

Using the easier solution along with trial and error, you can find the number that works best. However, to get an exact value, I have given you a more complicated example of what to use.
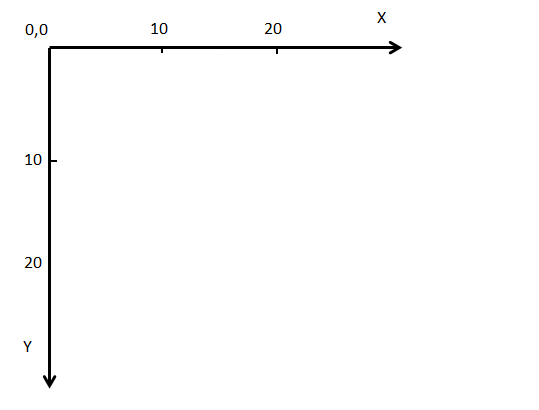
You might also wonder about why am I subtracting from the Y instead of adding the value to the Y. The problem is that the height of the "checkpoint" is lower than the height of the "Player". That means that I need to set the player higher. Notice that the values on the Y-axis increase from top to bottom. Y-axis starts at 0 at the top. It increases as it moves downward. Technically, I need a lower value to move something higher. :-)

Most 2D engines work in this manner. We start at the top left corner which is coordinate 0,0. We increase the first coordinate number going right as we follow on the X-axis. and we increase the second coordinate number going downward on the Y-axis. You can see how this is applied in the image above.
Solving another bug
Now, if we run a preview, and our player dies, its position is going to be set to the last saved "checkpoint" values. But there is one more bug! If our player dies before we collide with any "checkpoint", the variables have never been set. By default, variables have a value of 0, so our player is going to respawn/reappear at position 0,0 which is the top left corner as noted in the graph above.
We can easily fix this problem by setting the default values for the checkpoint values to be the starting position of the player at the beginning of the scene.

So when our scene starts, we already have our player in a proper position and we simply get the position of the player and store the player position as the "checkpoint" position. In case the player dies before colliding with any of the checkpoints, we use the player's original position variables to set its position back to the beginning of the scene.
Improve the system
Using what you have learned so far, you can try adding text to display a message if we reached a checkpoint. Then maybe, play an animation to make the cactus jump or something else to be more interesting.