A Beginner's Tutorial to an Endless Runner Game
This tutorial will help you get familiar with the way GDevelop works. In this tutorial, we are going to create a very basic endless runner game where the platforms are generated randomly and the player has to move to prevent being pushed outside the screen. There is also a score system which updates the score when the player is in action.
To know the basics of how the software works, you can refer for more information.
Download GDevelop
If you do not have GDevelop, download it from the official website : GDevelop App
It is advised to always check the above page for the latest versions of GDevelop and keep the software updated at all times. Once you have downloaded and installed the software, when you launch the program, you will be welcomed with a "Start" screen.
Main Game Elements
☆Player Sprite
 This is the main character that we, the user, will be controlling. The player sprite can only "Jump" to avoid the obstacles and to stay inside the screen. It has Idle, Run and Jump animations.
☆Platform/Obstacles
 These are the moving blocks that Player Sprite has to avoid. These blocks will be encountered by the player randomly.
☆Score Display
This block of text updates and displays the score while the Player Sprite is in action.
Download the Resources
You will be needing game assets that you can use to make the characters, platforms, and backgrounds for the game. Find all the resources you need for this game right
.
Step 1: Creating a New Project
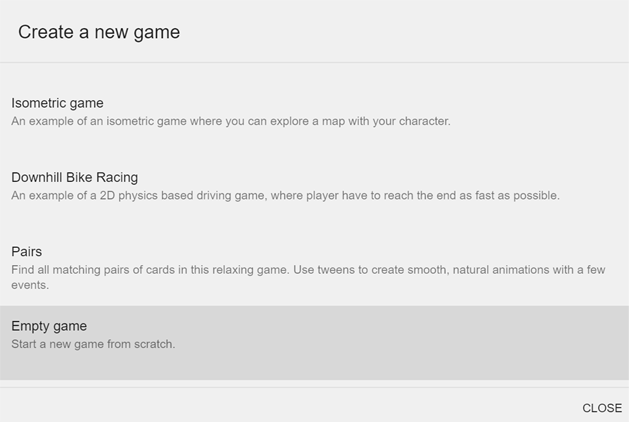
Once on the Start screen, click on the "Create a New Project" button. By doing so, a "Create a New Game" dialog box appears. Next, scroll down and find the "Empty Game" tab. Click on it to open a new project.
You can also choose to customize your Project location.

Click on the "Choose Folder" option to choose the location of your choice. Game project files will be stored at this location.
Step 2: Creating a New Scene
A game relies on scenes for different scenarios of gameplay. We can make and use multiple scenes, but for this tutorial, we only need 1 Scene. Let's create a new Scene.

Click on the area where it says Click to add a Scene to create your first empty scene.
You can customize the name of your scene by clicking on the three dots next to the created scene and clicking on Rename.
Make sure that you have already downloaded the archive mentioned before. You will be needing that for the game sprites.tip
Step 3: Working on the New Scene
Click on the scene that we had made in the previous step to open the Scene Editor. This is where we will be making the game elements.
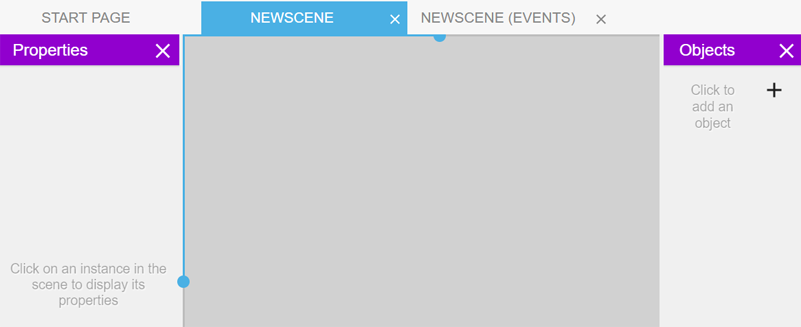
You should see the Object tab and the Properties tab. 
 If by any chance, you cannot see those tabs, click on the icon shown on the left to open the "Objects" tab. Similarly, click on the icon on the right to open the "Properties" tab.
The latest version of GDevelop will warn you if you try to load an asset which is not in your game project location. Make sure to always put your images in the same folder as the game (or a subfolder). Otherwise, if you move your game, it will break the links to the images. Uncompress the provided archive in the folder of the game and use those images. tip
Step 4: Creating a Player Sprite
As mentioned under Main Game Elements, we need a character that the user can control. Note that since this is an endless runner game, we only want the character to jump to avoid the obstacles that come in the way to stay alive.

Click on the Click to add an Object area on the Objects tab to create your first object. A dialog box opens which shows the various types of objects. For our character, we need a Sprite type of object, where we can add animations for the character being Idle, or Jumping, or Running.

Upon clicking the "Sprite" option, a dialog box to change the properties of the Sprite object appears. We are now going to add animations for our character. To add your first animation, simply click on the Click to add an animation area or on the + button.

A new empty Animation placeholder appears. We will now load our Sprite images to create our animation. As you can notice, our Animation has an identifier 0, We can supply a name to our animation too.
For our first animation, we want to create an Idle animation. Click on the big + button which will open a dialog box to load an asset. Note that we can also add multiples images, but for this animation, we only require one.
Choose the p1_stand.png image from the archive that you've downloaded and uncompressed. After you have chosen the file, the animation placeholder now looks like this.

Note that, I have given our Sprite object a name called "Player". Similarly, I have also assigned a name to our animation as "Idle". Naming is optional, but naming sprites within your project makes it organized and easy to use.
Our first animation is done. Now, let's add the Jumping and Running animations. Try doing it using the images provided in the archive that you've downloaded. There will be multiple frames for the Running animation, while the Jumping animation will only have one frame according to the archived file provided. After you are done with all three animations, it will look somewhat like this.
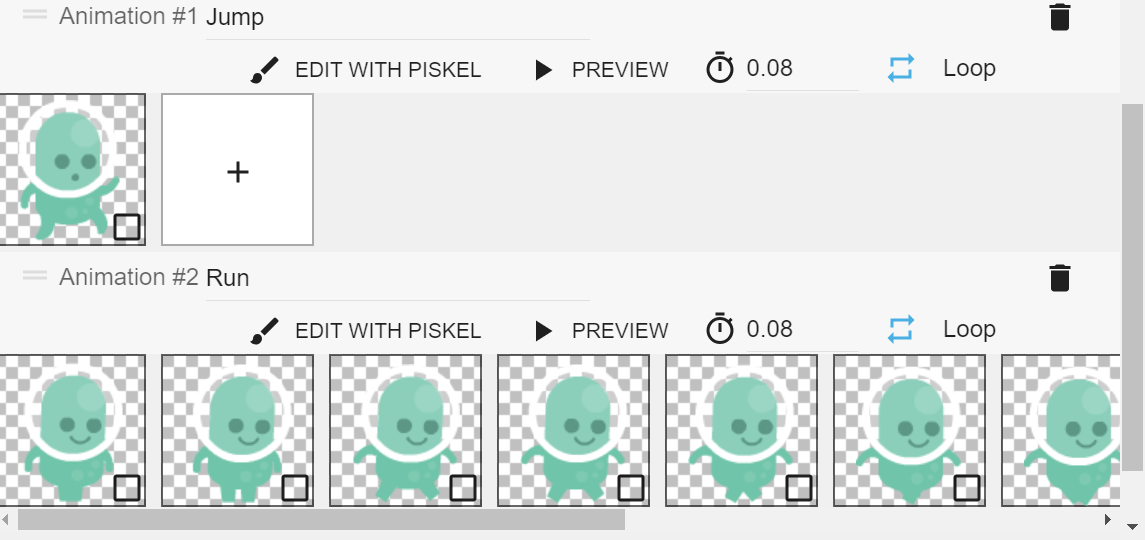
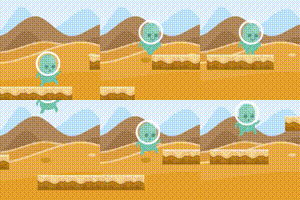
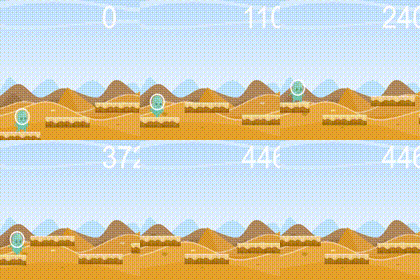
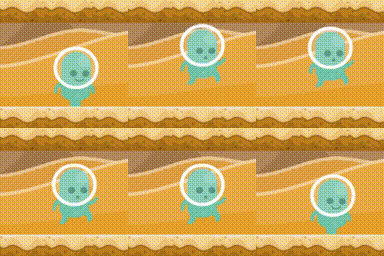
As you can see, the Run animation has multiple frames.  Each frame has a separate image file. When executed, all frames are played back to back, thus creating a running animation. The Run animation will look like the action shown in the image on the left.
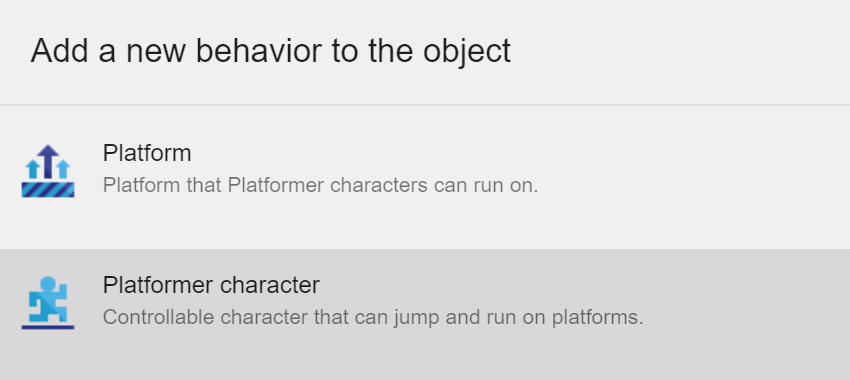
Now we are going to add a Behavior for our Player Sprite. Behaviors add extra capabilities to objects. Click on the Behaviours tab in the Player Sprite Dialog box. Then create a behavior by clicking on the "Click to add a behavior to the object" area. Then select Platform Character type of behavior.
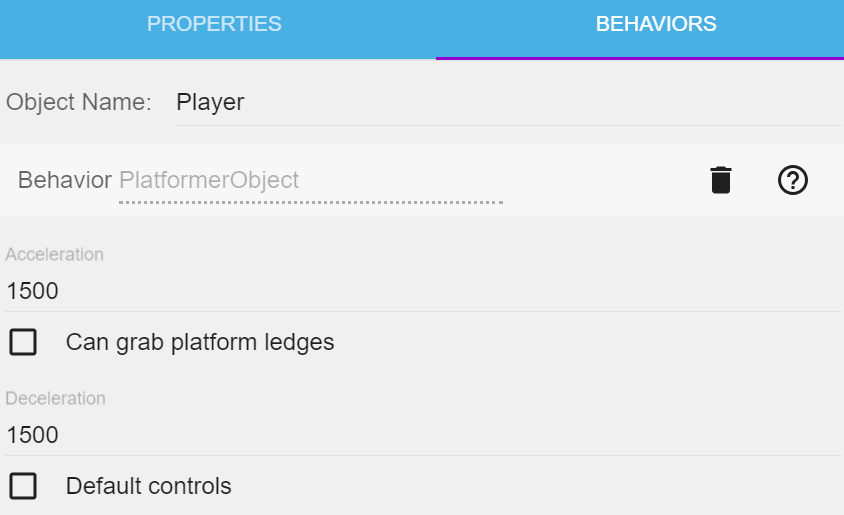
The behavior editor menu will open up. Here, make sure to uncheck the Default controls feature for this behavior. The default controls property adds all necessary movements for a platformer character including moving left, right and jumping. Since we don't want our character to move left or right, but only need the Jump action, we disable this property and create the Jump movement using events.
We are now done with creating our Player Sprite. Remember to enable the Loop feature for the animations where multiple frames were used, i.e., for the Running animation in our case. If we don't loop it, the animation will play once and stop at the last frame.
Step 5: Creating a Platform
A platform is an object a character can collide with and/or walk on. For our game, the platform will be the obstacles that the Player Sprite must avoid. To create a Platform object, click to add a new object on the Objects tab and choose a Tiled Sprite type of object. It's an image that is repeated like a mosaic.
![]()
After choosing the Tiled Sprite Object, we get a dialog box similar to the one for the Player Sprite we created. Click on the "Select an image" area to choose the image for our platform/obstacle. Once you are done loading the asset Platform.png, the dialog box will look something like this.
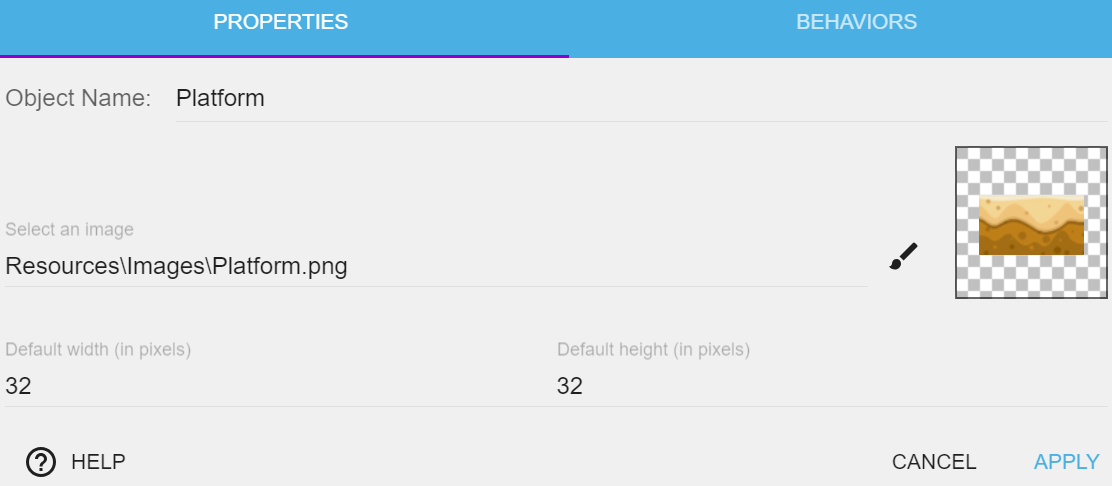
Notice that I have also changed the default object name to "Platform". Change your Default width to 193 and Default height to 40, for now. Now, we need to add a Behavior for this object, in a way similar to when we added behavior for our Player Sprite. Go to the Behaviors tab, click to add a behavior to the object and choose Platform type of behavior.
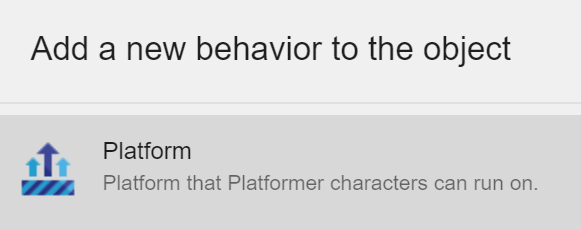
Click on Apply, once you are done. It's now time to place our created objects into the Scene space.
Step 6: Adding Objects to the Scene
Drag and drop the Platform and Player sprite from the Objects tab and place them within your scene.
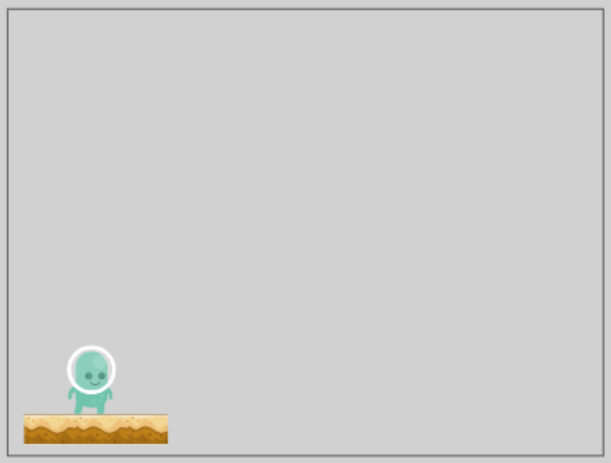
This is how the Scene space looks after I have placed both the objects. Note that the black border you can see is the Game Window size. The elements within this space are only visible to the user. We can change the window size by going to Project Manager->Properties, but for now, let it be the way it is.
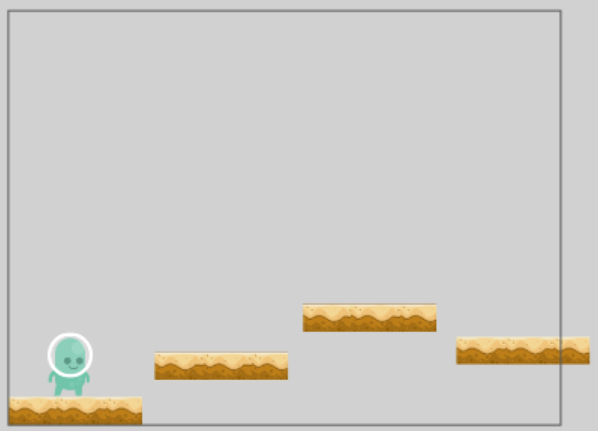
Click on the Obstacle object in the scene space and do Right Click->Copy or Ctrl+C (for Windows) to copy the object. We are going to create multiple obstacles to fill the scene space. After you have copied, do Right Click->Paste to duplicate the object on the scene space. Do it multiple times to fill the scene. The scene now looks like this.
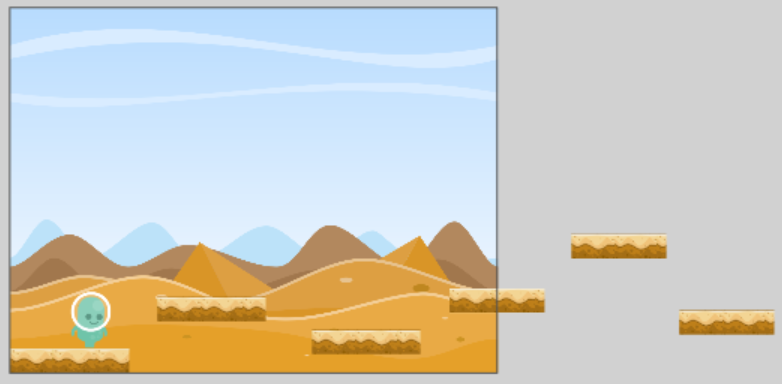
We need to create some more Obstacles/Platforms towards the right of the scene space for smoother random generation of obstacles. Lastly, we add a Skybox or background for our game. It is a Sprite type object. Try adding this object on your own. The asset being used here is background.png. The scene now looks like this. Notice the additional obstacles created. To put the background image behind all the other assets, we want it's Z-Order to be minimum. Z-Order can be changed in the Properties tab on the left.
Now comes the most interesting part. It's now time to make our game functional. Learn a few things about Events before moving to the next step.
Step 7: Creating Events/ Making the Game Functional
Events are what we use to create the rules of any games in GDevelop. This is what makes GDevelop special compared to traditional game engines. Events in GDevelop allow you to visually program your game without any programming knowledge or experience, so people with any background will be able to create the actual game-play and allow players to interact with the game.

 That being said, let's make our first event. Move on to NewScene(Events) tab by clicking on the mentioned tab. Then click on the icon shown on the left to create an empty Event.
For our first event, we want our Player Sprite to Jump when the Up arrow key is pressed. To do that, we need to add a condition to detect whether the Up key is pressed or not. Click on Add a condition and search for the "Keyboard" category. Choose Key pressed condition and make it check the Up key as shown below.
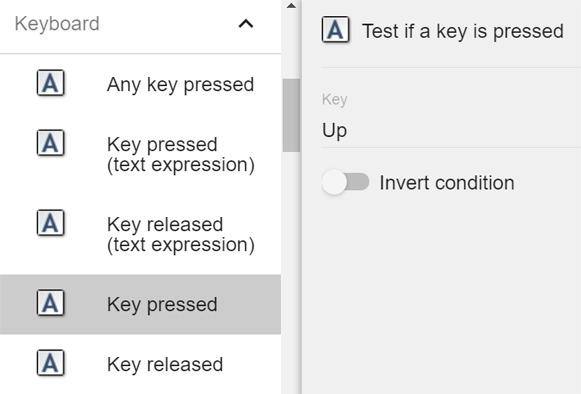
Click on OK to confirm and we will have our first Event condition. Next up, we need to "Add an action" that will take place if the condition is met. We want our character to jump when the specified condition is met. To add this action, search and click on Platform Behaviour->Control->Simulate jump keypress.
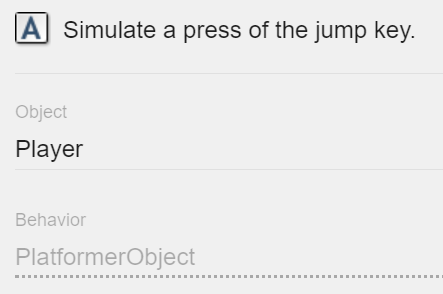
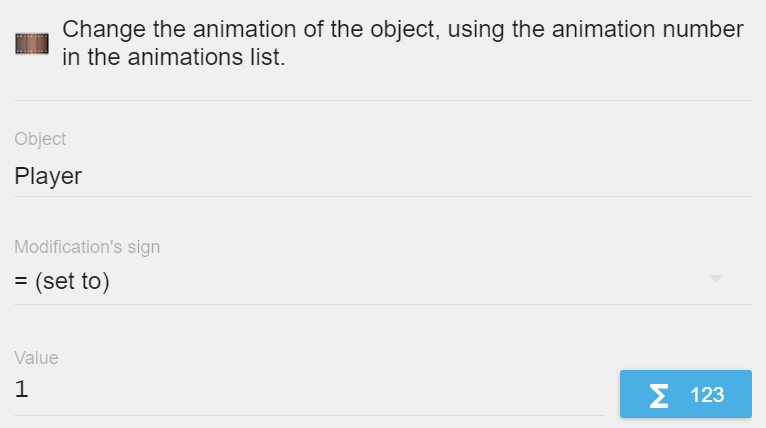
Note that the Object should be set to Player as we want the player to perform the action. Now we also want the jump animation to play while the Player Sprite jumps. To do this we add another action for the same event condition. Click on Add an action->Sprite->Animation and images->Change the animation and set it as shown. Note that instead of using identifier numbers, you can also use the animation name. To refer to animations using their name, you should use the Change the animation (by name) option instead. The name should be within quotes.
 The Events tab will look something like this now.
Adding Comments is a good way to keep the event editor organized. To add a comment, click on the icon shown on the left. Comments are used to describe what is being checked and performed in that particular event for debugging later.tip

 It's now time to see how the created event works. Click on the
 Play button to Preview the Project. A preview window opens up, where we can test the various functions in our game. The preview window shows us exactly how the game looks and performs while in action.
 Right now, we want to test the event that we just created, i.e, making our character Jump and also playing the jump animation while jumping. Use the Up arrow key to test the jumping action.
We can see our character jumping and also the animation has now changed to the Jump animation specified. Note that the character stays in the Jump animation state even after coming back to the ground. We will handle this problem when we create other events.
Making the Obstacles Move
For the second event, we will now make the obstacles/platforms move towards the left of the screen. To do this, we need to specify a force due to which the obstacles move at a certain speed. First of all, click to add a new event just like you did for our first event. No need to specify any condition for now. Let's focus on the actions.
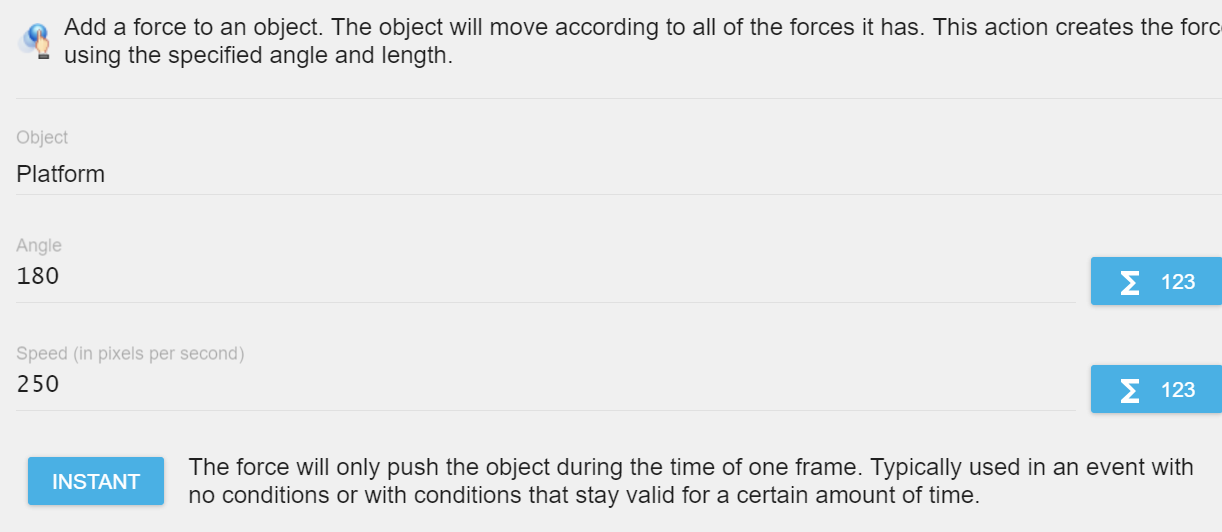
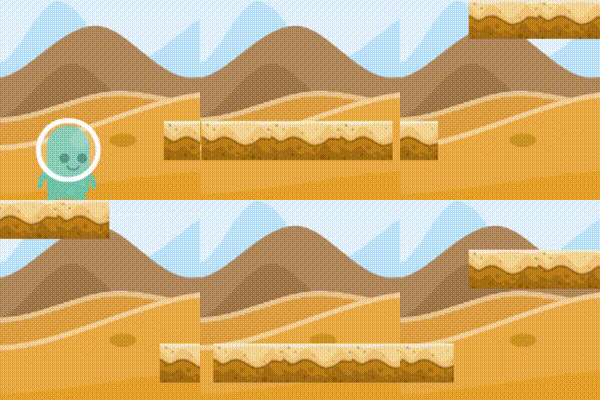 For our first action, click to "Add an action". Then find Common actions for all objects->Movement->Add a Force(Angle). Then choose Platform as the object and assign it an angle 180(specifying left direction) and a speed 250. You can test the action we just created by using the Play button to see a preview. You can see the obstacles moving towards the left. Notice that when the Player Sprite comes in contact with the Platform/Obstacle, it also moves(slides) towards the left. We don't want our character to move when he is on the floor of the platform. Our next event handles that.
As mentioned above, we need to fix the Player Sprite sliding issue. To do that, we will make use of a new event. Click to add a new event, and "Add a condition", Platform Behavior->Options->Is on floor. Choose the object to be Player because this is what we are trying to check, i.e, whether the character "is on floor".
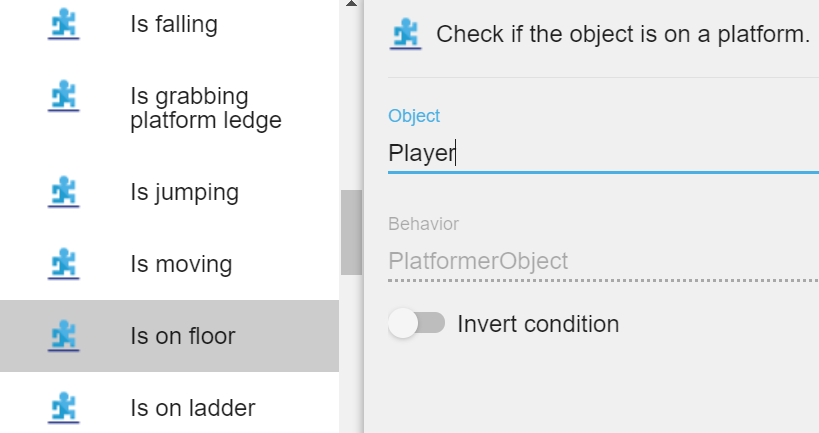
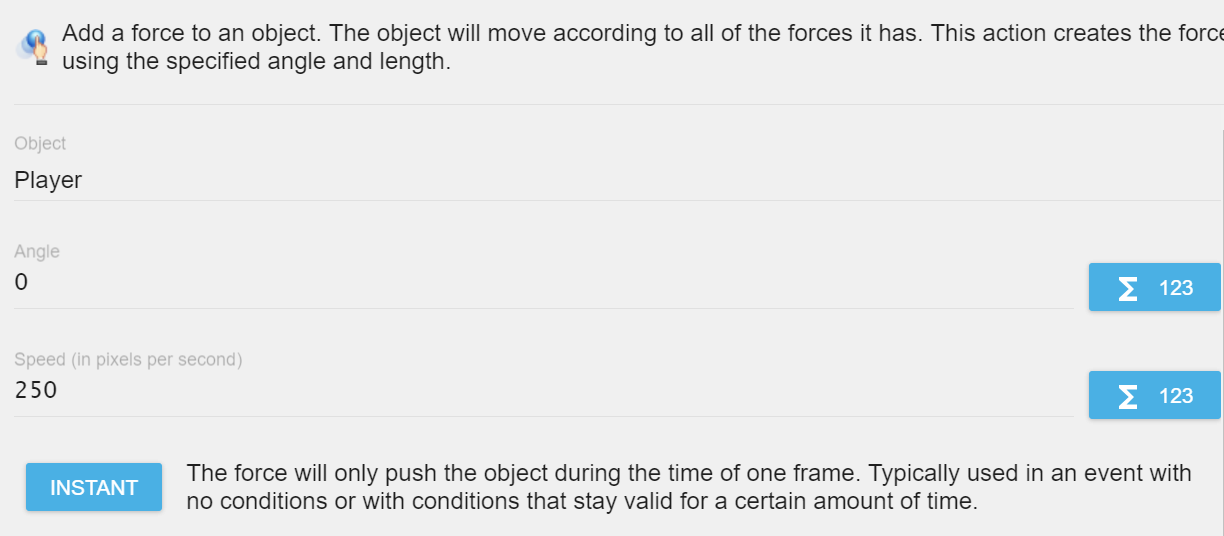
Now, we need to add a corresponding action. Add an action to this event, similar to the one we added for the obstacle/platform to make it move towards left. This time, we need to make our character move towards right whenever he is on the floor of the platform. We say "move towards the right" but our character doesn't really move. It just balances the negative movement of the platform or obstacle so that the character does not slide. Try to add this action yourself.
Hint: Click on Add an action. Find Common actions for all objects->Movement->Add a Force(Angle). Then choose Player as the object and assign it an angle 0(specifying right direction) and a speed 250.tip
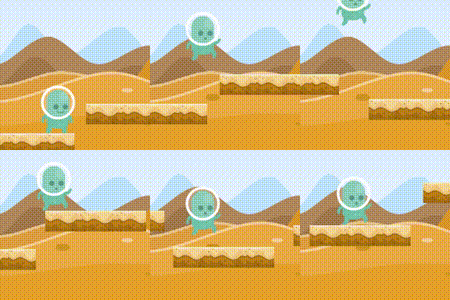 Now you can try the preview of the events we made. You can see that now the sliding problem has been fixed and the basic game mechanics have been successfully created, that is, the character can jump to avoid the obstacles and the obstacles move constantly towards the character. Note that at this point, the obstacles are limited and the character soon runs out of platforms to jump on. We are going to work on this problem in our next event.
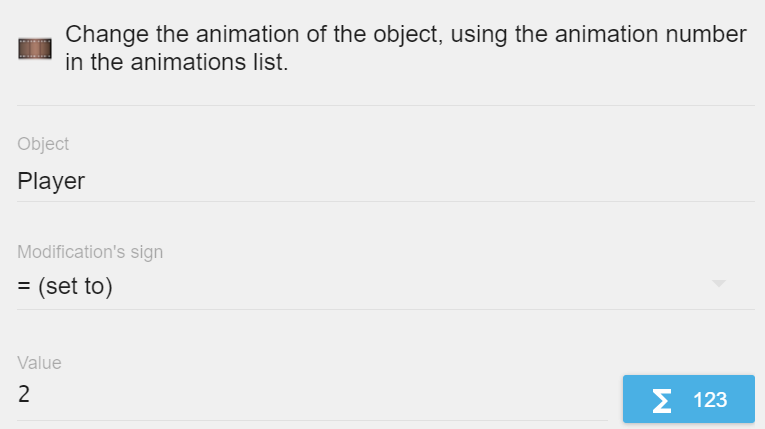
We also need to make the character play the Run animation when he is on floor. Since we have already made an event to check the "Is on floor" condition, we can simply add another action for this same event. Click Add an action->Sprites->Animation and images->Change the animation. Then fill in the object and the correct animation identifier to play that particular animation. For this game, we saved our Run animation at the identifier 2. You can also use the animation name as an identifier. To refer to animations using their name, you should use the Change the animation (by name) option instead. If you use a name, don't forget to put the name within quotes (") as it is a string.
Making the Game Endless
Create a new event. In this event, we are going to make the platforms endless. Before moving on, go back to the scene space and analyze the X position of the last tile of the Platform/Obstacle.
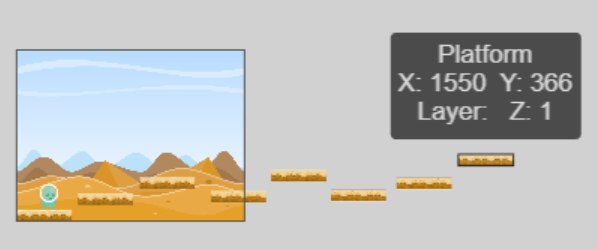
As you can see, the X position of the last tile is 1550 for me. Don't worry if it's different for you. Whatever be the value, we will use that value to make the platforms endless. Now, Add a condition for this new event. Find Common conditions for all object->Position->Compare X position of an object. Choose the object "Platform" with Modification sign ≤ (less or equal to) and value let's say -200.
We are checking and comparing the X position of the first tile of the platform here. The condition is if the X position of the Platform is ≤-200, then the corresponding action will be executed. Now you may be wondering why the value -200? Well, our scene space X position starts from the value 0. We need to detect when the leftmost tile of our platform exits the scene space. We chose -200 as an arbitrary X position, which is out of the scene space.
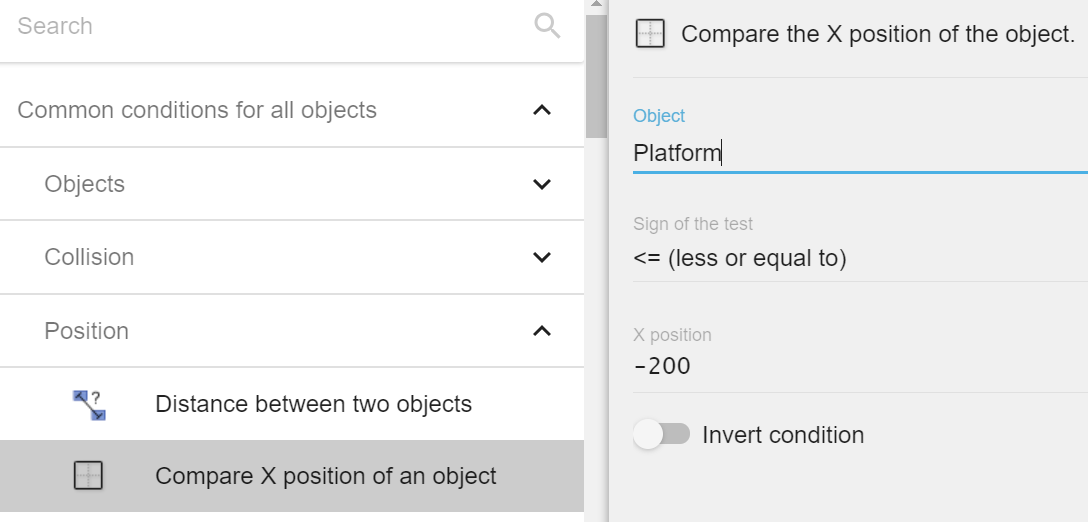
Once the condition is in place, we are going to Add an action. Find Common conditions for all object->Position->Change the X position of an object. Now, we make use of the value of the X position of the last tile that I asked you to remember. For me, it was 1550. Now, we choose "Platform" as the object, Modification sign as = (equals) and value is 1550. Click OK to confirm and there we have our event completed.
 What we did in this event was that we set up a Loop for out Obstacle/Platform tiles. As soon as a tile went out of bounds, that is out of the scene space, it was teleported to an X position(1550 in my case) towards the right. Thus, the Obstacle tiles keep on looping and the game runs endlessly.
Game States
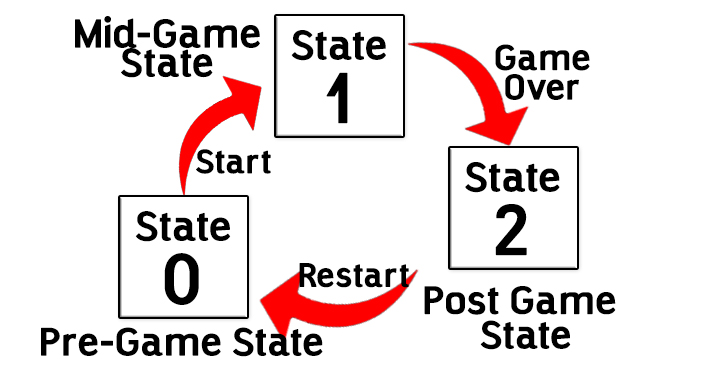
We will now add states to our game. States describe the status of our game. It can be considered as a flag, to detect when the character is in action or when the character has fallen off the platform. This is needed to decide a "Game Over" state and therefore, restarting the game. We can record the state by simply creating a scene variable. There will be 3 states for our game.
- First state or the initial state is when the game hasn't started yet and it requires the user to start the game. We are going to refer to this state using the value 0.
- Second state is when the character or Player Sprite is in action. We are going to refer to this state using the value 1.
- The third state is the "Game Over" state when the character falls off the platform. We are going to refer to this state using the value 2.
First off, we need to set up a variable to store the current state of the game. Create a new event. Add a condition->Scene->At the beginning of the scene.
Next, Add an action->Variables->Value of a scene variable. Then name your variable something, state for example and set it to 0. This sets the game to the initial pre-game state at the start of the scene.

We don't want our game to start immediately. We want it to start after the user presses a key.
In other words, we want the game to start when the value of the scene variable state is 1. Let's modify our events.
Hint: In the event where we specified a force for the Platform to move, we will now add a condition. Click Add a condition->Variables->Value of a scene variable. Set it to check if the value is equal to 1.tip
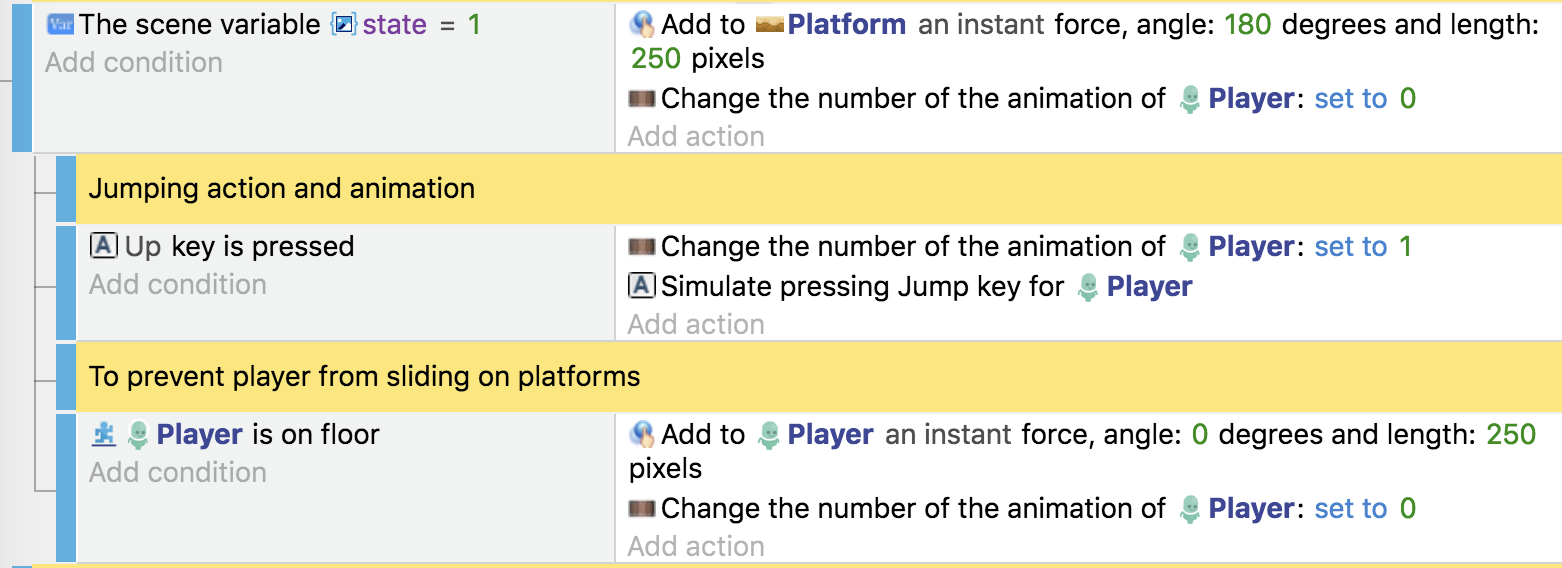
See the changes I made in our events: I added a new condition and made some sub-events. The condition of a sub-event is tested only if the parent event's condition results in true. In our case, if the game is in the initial state(event), only then will the sub-events check the respective conditions and perform their corresponding actions.
To convert an event into a sub-event, you need to drag that event to put them under a parent event to which it is associated. You will notice an indentation in the event-sub-event ladder which confirms that the indented events are "sub-events" with respect to the parent event.
Sub-events work only if the event condition results to true. If the parent event's condition results to false, the sub-event conditions won't be checked and thus, their corresponding actions won't be executed even if the sub-event conditions result in true.
To add a new sub-event altogether, click to choose the event for which we are creating the sub-events. Then click on the icon shown on the left. You can find that in the Navigation Menu of GDevelop.
Now, unless the value of the scene variable is 1, the game won't start, that is, the platforms won't move nor the player can jump.
We need the user to start the game by pressing a key. To do that, add a new event. We need two conditions here. One for checking the value of the scene variable and another for detecting if the key is pressed or not. Both these conditions have already been added in some form in the other events. Try to do it yourself ;-)

Hint: For the first condition, we need to check the value of the scene variable state. Click on Add a condition→Variables→Value of a scene variable. Set it to check if the value is equal to 0. For the second condition, Add a condition->Keyboard->Key pressed, then set it to check for the Up key. tip
Now, we add the action to change the game state. We want to change the value of the scene variable to 1. Click Add an action->Variables->Value of a scene variable. Then name your variable something, state for example and set it to 1. It will look something like this.

You can now test how the game works. You will notice that the game does not start as soon as you click the Play button. You need to press the Up key to start the game. Go through what we did above once more if you did not understand what happened :-P
Now, we need to work on the third state, i.e, when the game ends due to the character falling off the platform. We need to check the X and the Y positions of our character, i.e., we need to check if the character is inside the scene space. If he reaches outside, it is obvious he has fallen off the platform or has been pushed outside the screen. We check for these conditions and change the state of the game to Game Over state.

In this event, we use the concept of a condition and a sub-condition. Before we get more into the logic, let's first set up this condition-sub-condition ladder. Add a condition->Advanced->Or. This is the main condition we use. After you have confirmed and made this condition, you will notice, you can now add sub-conditions. Try to do it by yourself by seeing the image above.
Hint: Find Common conditions for all object->Position->Compare X position of an object. Choose the object "Player" with Modification sign ≤ (less or equal to) and value let's say -69. Similarly for the next sub-condition, find Common conditions for all object->Position->Compare Y position of an object. Choose the object "Player" with Modification sign ≥ (greater or equal to) and value let's say -550. tip
Now, let's understand what we did here. The condition we added specifies a rule such that if even one of the sub-conditions is true, then the action associated with this event will be executed. Since the game ends if he falls down (Y position) or gets pushed outside the screen(X position), so we check for the X position and the Y position.
Now we want to change the state of the game when this happens, so we add an action to change the value of the scene variable to 2, the required third state.
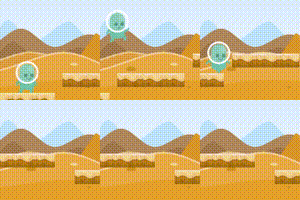 You can now test the game. You will notice that if you fall down or get pushed out, the movement of the obstacles stops. This shows that the game has successfully reached the Game Over state. In our next event, we will work on restarting the game, when the user presses a key.
Restarting the Game
 We want the game to restart once the user presses a button after reaching the Game Over state. To achieve this, let's create a new event. We want to check whether the state of the game is 2. If it is, then we want the user to press the Enter/Return key to restart the game. For this, we add two conditions, one for checking the value of the state variable and another for checking whether the Enter key is pressed. Try to add the conditions yourself or see the hint if you are stuck.
Hint: For the first condition, we need to check the value of the scene variable state. Click Add a condition→Variables→Value of a scene variable. Set it to check if the value is equal to 2. For the second condition, Add a condition->Keyboard->Key pressed, then set it to check for the Return key pressed. tip
Next, we need to add an action to restart the game or scene. To do this, Add an action-> Scene-> Change the scene. Then specify the name of our scene within quotes. Select the Stop any other paused scenes option. This option is not necessary for our game since it only contains one scene, but it may be beneficial for increasing the performance for games having a large number of scenes.
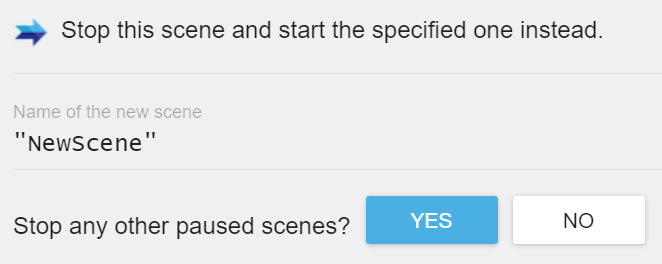
Now, after the Game Over state is reached, when the user presses the Enter/Return key, the game restarts and is taken to initial state, that is the state where the user has to press the Up button to start the game.
You can now test your game and notice the change in states. All that is left now is to add A Score system and some textual instructions to help the user know about the game states.
Adding Score System
A Score system is a necessary element in every game. Adding this to our game is very easy as we don't need to add any new events. We are going to edit some of the events that we have already created to accommodate this system. We want the score to start from 0 every time the game starts. The score keeps updating until the Game Over state is reached. First, let's make an object variable to store this score value.
You can also use other types of Variables like Scene variables and Global variables instead of object variables that we are using here. The way these variables differ is that they have different scopes for the game. You can learn more about Variables here tip
Go to the Objects tab in the Scene Editor panel. Choose any object of your choice. We choose Platform here. Click the three dots beside the Platform Object tab and choose Edit Object Variables. A new dialog box opens up where we can add and configure variables for an object. Click the big Plus button to add a new variable. Then customize the variable name and value as shown below.
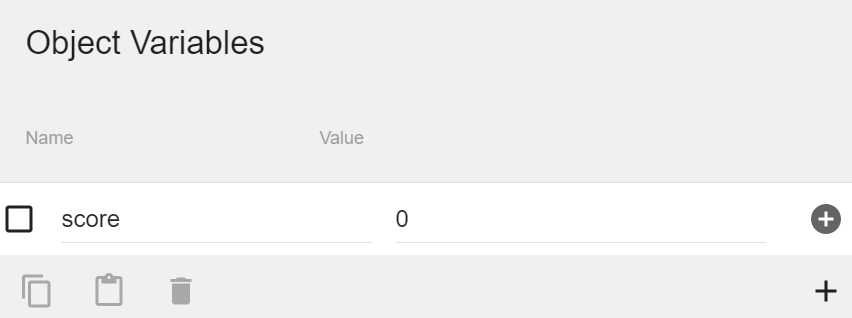
Now as you can see, we set its default value to 0. Now we need to make an action to update the score. Find the event shown below that we had already created before.

We will add this action here. Click Add an action. Find Common actions for all object->Variables->Modify a variable of an object. Then do as shown below.
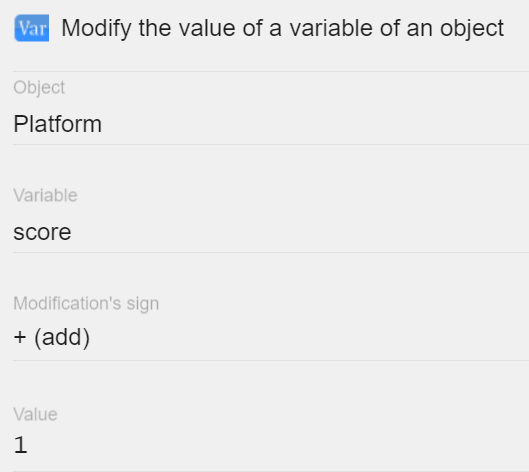
We want to modify the object variable we just created. By adding this action, we tell the game to update the value continuously while the character is in action.
We need a Text object to show this change in value. Go the scene editor. Add a new object of type Text.
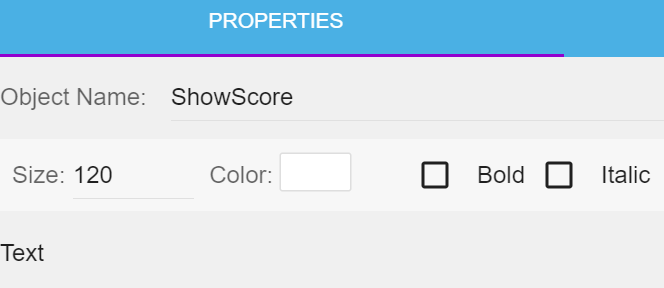
Do the necessary modifications as shown above. You can customize it as you like. After you are done editing the text, click Apply. Then simply drag and drop the text object to the scene space. It will be something just like this.
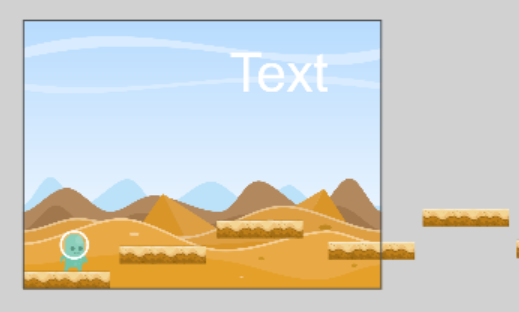
Let's go back to the event we were editing. We need to add another action to update this text.
Once we are back to that particular event, click Add an Action->Text Object->Modify the text. Now look very carefully at the image shown below. Now, the text object has a value of String type but our score variable stores number values. We need to use a library function here to convert that Integer to String and then update the text of the Text object.
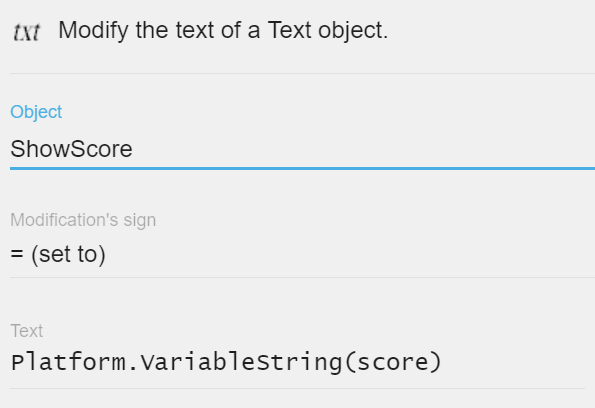
 We use the function
 VariableString(variable) to to do our job. You can learn more about library functions in their respective tutorials. You can now test the game. You can see the score updating while the player is in action. As soon as Game Over state is reached, the score stops updating.
The event we modified will look something like this now.

Now we will add other necessary text objects for our game like a Game Over Text, a Score text, a Press Enter to Restart and Press Up to Start. For each of them, we will be creating separate Text objects. Similar to our previous step, add new text objects and modify the text in the object editor. Simply drag and drop them to your scene space to display them.
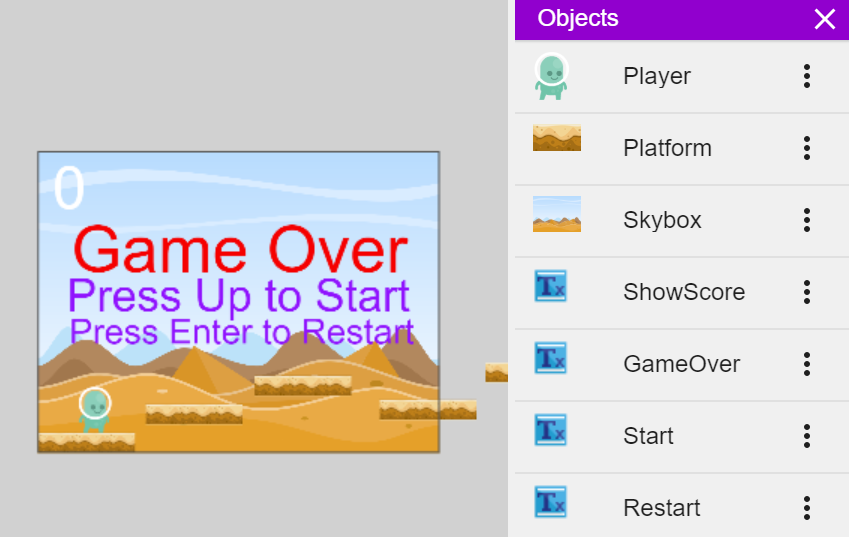
Notice how I made separate text objects for separate texts. But we don't want our game to show the Game Over text at the beginning. The Game Over text should only be visible only at the Game Over state, that is when the value of the state variable is 2. Similarly, we want the Press Enter to Restart text to appear at this stage too while the other texts should be hidden. At stage 0, the Press Up to Enter text should be visible. While the player is in motion, we want to hide the texts. For this, we need to act on the visibility of these text objects.
For this visibility modification, we use the action Common action for all objects-> Visibility action. After adding all the actions at their respective places as stated above, the events editor page will look something like this.

Here at the beginning of the scene event, we have already made, we add two new actions to hide the Game Over and Restart texts. To add these actions, click Add an action-> Common action for all objects-> Visibility-> Then Hide or Show accordingly.

Now, we also want to hide the Start text, when the game has already started. For this, we add another action to the even already created above.

Lastly, we add two events to Show the Game Over and Restart text when the game ends, that is when the Game Over state is reached.
 There we have it! You have successfully learned how to create an Endless Runner game. Making games with GDevelop is very easy once you grasp how to use the features. It took me about three days to write this tutorial in detail, while it only took me about an hour to create this game. Yes, that's how simple it is to make games in GDevelop💓
Bonus: Making the Game More Challenging
Is the game way too easy to play? Do you want your game to be a little more challenging? Don't worry. Let's work on it together.
We are going to work on the speed of the moving platforms/obstacles. We want them to move faster as the score increases.
First of all, we want to add a new scene variable to store the initial speed with which the platforms move. To add a scene variable, let's go to the event which has the At the beginning of the scene condition. Just like we did before, add a new variable. Click Add an action→Variables→Value of a scene variable. Then name your variable something, speed for example and set it to 250 which is the initial speed.
Now, we want to change the event: where we specified the value of the force with which the platforms move. Instead of specifying a value, we will use the scene variable speed. To use the scene variable there, we need to follow this syntax: Variable(speed), where speed is the scene variable specified.
Do the same thing for the action where we specified speed for the player sprite to avoid sliding. Now, we can work on changing speed as the score increases.
Now, we want to check the value of the object variable score, and change the value of the scene variable speed accordingly. Add new events and specify the conditions to increase the speed of the platforms. An example is shown below:
